 Thanks: 0
 Likes: 0
 Needs Pictures: 0
 Picture(s) thanks: 0
Results 31 to 45 of 55
-
19th February 2007, 11:59 PM #31

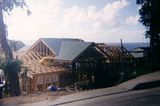
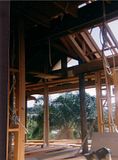
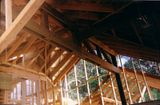
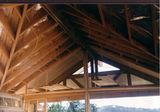
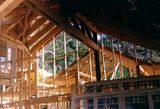
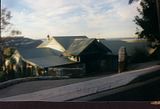
Here's the job I was looking for. Exposed timber poles inside and out, supporting big exposed trusses that I built up in place off a scaffold. One triangular truss, and three parallel chord trusses, then pitched the roof on top of it. sexiest house I've built, with a wet edge pool looking down on Whale beach on Sydney's North Shore, and it was just their weekender. (why doesn't some of their bloody money rub off on me
 )
)
I had a three story fall on that job as well. Landed on a pile of mud luckily. Got up, scraped the mud off, and went back to work. My back got worse over the next few years, until I was laid up in bed for a year. Had an operation and it's alright now, but still gets a little sore sometimes.
My own stupid fault of course. Not to worry.
-
20th February 2007, 12:18 AM #32

John,
nice
bugger about the fall. Of course with all the safety regs now that stuff doesn't happen anymore, does it.
Mick"If you need a machine today and don't buy it,
tomorrow you will have paid for it and not have it."
- Henry Ford 1938
-
20th February 2007, 12:58 AM #33
 hagen saw
John,
go here and see my post, no. 308 for a couple of pics of a hagen saw. Actually the bloke cutting the posts for that house I did.
Mick"If you need a machine today and don't buy it,
tomorrow you will have paid for it and not have it."
- Henry Ford 1938
-
20th February 2007, 07:55 AM #34

Very quick post. Been up all night dealing with a personal situation when I'd intended to be drawing, then catching up with drawing. Working after no sleep... great. Thank god I'm not using power tools.
Pawnhead, have printed your long post and images with it. Thanks very much, looks like it's exactly what I need. Will post new sketches soon but I think I've got it sussed now! Of course that might feel different tonight
Awesome roof and saw pics too, guys I'll add this little puppy to the thread when it's done, but it's not anywhere near as impressive visually. Just a little roof on a very ordinary building - not those gorgeous places you've been working on <snif>
Grant
-
20th February 2007, 10:26 AM #35

Some interesting geometry happening here. Just wanted to see if I could quickly draw the overall shape in sketchup. Answer was yep.
Those are my principles, and if you don't like them . . . well, I have others.
-
21st February 2007, 03:33 AM #36
 I’m sure you could do it if you learnt a bit of trig. It’s a bit like installing a valley flashing with the appropriate angles cut.
 Originally Posted by bricks

Just read my instructions carefully, and I’m happy to explain anything that you don’t understand.
Wow, that looks awesome.
I wouldn’t mind one of those, and a hundred acres somewhere with ocean views. People don’t appreciate the time that’s spent off-site at night, doing calculations to ensure that there are no mistakes made on-site.
You live and breathe the job sometimes.I’ll finish my set out tutorial soon, but I’m very busy with another important matter at the moment.
I take it that you’re OK with the calculations since you haven’t posted any site dimensions as yet.
If you want me to check anything then just ask.
I’ll be expecting some pics.
BTW. If you want to display anything in these parentheses < > then you have to leave a space before your wording, or it’s picked up as HTML code and it’s invisible in the post. It came up when I hit "Quote".
A few points to mention.
Before you install your cripple rafters and jack rafters, brace up your valley rafter so that it’s straight. You could use a stringline, but your eye should be good enough.
At all stages of construction, keep an eye on all of your roof planes. By sighting along the top of the roof, you should be able to pick up any discrepancies that are more than + / - 5mm. It may look a bit wonky because some of your members may have a larger upward bow than others. They will be straightened out when you install your purlins (if there are any), but any glaring errors should stick out like dogs nuts at this stage. If there are any, then obviously you have to backtrack and find out where they are before progressing any further.
Any noticeable bows that won't be straightened out with a purlin should be planed out.
That’s brilliant zenwood, although you have the same eaves dimensions all around, and a symetrical octagon, whereas Grant doesn't. As I’ve said, I’m just trying to get the hang of Sketchup, but I’m very slow. It would certainly be handy to have all these sketches of mine to scale, and being able to rotate them in 3D would be a bonus.
In those perspectives you can see what Grant was talking about with the broken 'bastard' hip. It has a much shallower pitch than all the others.
To do the job so it's technically perfect and symmetrical, you'd have to pitch three different hips there, to imaginary points corresponding to the octagon corners.
Of course this would involve a lot more work, and the valley would have two doglegs in it.
-
21st February 2007, 10:08 AM #37

Carrying on from where I left off: -
Once you’ve located the bottom of the Southern valley, it’s a simple matter of running two stringlines to locate the -
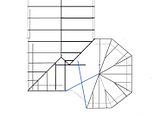
Then using the same methods as described previously, you can measure your last valley, cut and install. With inside angles, I usually cut a beak in the bottom of my valley rafters to support the fascia joint, but you could cut it short and put a cleat on each side to support each adjoining fascia. Ditto, with outside angles, I usually cut my hips to a point.
Then cut and install your broken bastard hip.
Then determine the positioning of your rafters, and cut the 600mm overhang on the broken ridge, so that it butts into the nearest rafter.
The intersection should look like this in plan: -
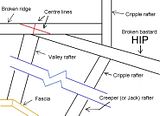
And the completed roof framing should look something like this.
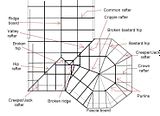
Then after you've installed all of your purlins (do you need advice?), valley boards, fascias, anti-ponding boards (if you can be bothered with them), and eaves linings, get a piece of builders plastic about half a metre square, nail it to a stick, draw a picture of a pawn on it (j/k you don't have to do that
  ) , and nail it to the highest point of the roof.
................................................................... :aussie3:
It's a signal to the builder that he’s not allowed on site unless he has a slab of beer under his arm.
.........................................................
Then take some pics, and post them up.
-
23rd February 2007, 01:43 AM #38

I wrote up a nice long reply to this last night, multiquoted and all. Then I shut the machine down without clicking 'post'.... ARGH!
We have the main roof complete on the W side, all the SW jacks, the octagonal SE half and most of its jacks, and have the minor ridge in place with all the strings ready to do the W crippled hip. The double-birdsmouthing over both steel and top plate has been... entertaining shall we say. As has the fact that I made a glaring mistake in my reasoning.
A 190 wall height increase results in a 400 eaves width CHANGE. This means that the overhang around the octagonal area is 475 (400 plus styrene) versus just 75 for styrene only in the areas without eaves. Stupid stupid simple reasoning mistakes like that really bug me, and I would have caught it if I'd prepared the section I was going to do but eventually decided against on the grounds that it would take too long and that I had it in my head already. HA!
Thankfully it doesnt change anything we've already built except the overhangs on the bastard hips in the octagonal area. They can be extended easily because the eaves are closed. Took about a dozen photos today and will take more when we finish tomorrow.
We will finish tomorrow because I'm bribing the boys with steak, snags, coleslaw and beer. No finish, no eat. Does that make me a bastard?
-
23rd February 2007, 09:25 AM #39

Chipper,
A picture is a thousand words, post em up.
Interested"World's oldest kid"
-
23rd February 2007, 11:02 AM #40

Just extend them with a cleat on each side. It will look like it was intentionally done to give extra support to the fascia.
I never make mistykes. All my projekts are perfikt, except for that time I read the plans upside-down. But the best builders are the ones who know how to fix up stuff ups, so I talked them into making a novelty of it and everyone was happy.
Not at all. Just look after the boys, and they'll look after you.
Here's a few more shots whilst we're waiting : -
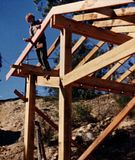
Me on a roof, about twenty years ago
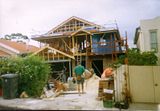
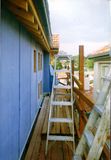
A very wide dutch gable that had to be supported by diagonal props back to the house after the blue board was installed. I built the scaffold out of hardwood. (That's me in that first shot, with my 6 1/4" Makita in hand)
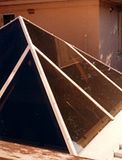
A cedar glass pyramid at Double Pay (Double Bay)
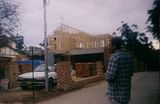
That's me in the foreground, and you can see the flag on the ridge, and the obligatory flanny shirt.
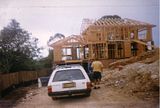
This one at Harboard was trussed with a bit of stick work on the tricky bits.
(That's me on the right, and my brother on the left. I taught him the trade, partnered up with him, and we had up to four carpenters working for us at various stages of our contract carpentry business. You can see that we both like our K-mart flannys)
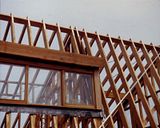
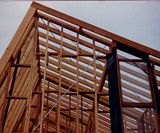
Here's an unusual one.
-
23rd February 2007, 08:37 PM #41

Hi Chipperhead, Pawnhead is definetly putting you in the right direction. As i have done some 17 years of architectual conventional (stick) framing, my advice is to keep all hips and valleys running at half the angle of the wallplates that they are coming off. Who ever drew your architectual drawings has given you a bum steer! They are incorrect! A great book that will help you is the "Hancocks roofing manual", you should be able to purchase it from any (construction) tafe college bookshop. It will give you Rafter, Hip and valley lengths, as well as ridge heigths. A roof like this is impossible to explaine over a screen but Pawnhead sounds like he's your best bet!
Best of luck, Jason.
-
24th February 2007, 06:32 PM #42

Actually, I did the drawings myself. And they're not incorrect. If anything they're astonishingly accurate even if I do say so myself. In the end, I am sure I could have gotten away without them, and just used roof framing tables to pick up my plumb cut angles etc, but the drawings did help me get my head around how to set the roof out. If I HAD simply halved the angles of all my wall plates the roof wouldnt have worked. I would have had hip rafters that didn't meet. Pawnhead has definitely explained how to project the various roof planes around the place, and made it clear how well that technique works. I DID make a small mistake at the interconnection of the western broken hip and the valley, but nothing a bit of planing can't fix. I'm glad it's a tiled roof

I actually have a really neat basic roof framing book that has all that as well. I can't remember the name of it but it is a great 'join the dots' guide - to a basic hip ended roof for an L shaped building with different roof widths. Nothing this complicated. I've done all the calculations myself on this one, using a spreadsheet and some basic use of pythagoras and a little trig. It's all worked out very neatly in the end. The last two beams to put in were the eastern broken hip and its associated valley. They measured out to 15mm off what my drawings had estimated them to be. I reckon that's pretty good going. What has been a little disturbing is the depth of some of the birdsmouths, but I'll explain that in a later posting.
Anyway, all the structural elements in the roof are in. I just have about 15 rafters to go, all creepers and jacks. Monday. Photos are coming
-
25th February 2007, 10:20 AM #43

Cooee fella's, daunting project, but like all things once you put your mind to it the only thing you cant do is wipe your bum with your elbow! All this talk of trig, I had to let you know about these calculators. I've had the same problem as others in that I forget all the trig stuff because I dont use it enough. This was really giving me the s%$ts, so I ordered one of these;http://www.jobbercalculator.com/tutorial.htm
No longer will you ever suffer bewilderment from trig, this thing is worth its weight in gold."the bitterness of poor quality is remembered long after the sweetness of low price is forgotten"
-
25th February 2007, 10:47 AM #44

35mb

Does it give you a complete history of trig dating back to the pyramids or something?
I could explain it simply in a reasonable sized post. It's not that hard, but of course you need some intelligence and a bit of practice.
-
25th February 2007, 12:18 PM #45
 "the bitterness of poor quality is remembered long after the sweetness of low price is forgotten"


 Reply With Quote


 , its fast, accurate, eliminates human error & most of all it saves precious onsite time. If you can do all that without one (as some people can) I'm jealous.

Bookmarks